


Do you want to create a Machine Learning Model within 5 minutes? If so, you've come to the right place.
In this tutorial, we will build a simple website empowered by the Teachable Machine Audio Model. This is a beginner-friendly project that uses only HTML, CSS, & JavaScript.
Here is the live demo link ( please make sure to allow pop-ups)
Step 0: Project setup
Create a new folder on your desktop, I'll call mine 'website-redirector'.
Inside this folder, create an index.html file.
<html lang="en">
  <head>
    <meta charset="UTF-8" />
    <meta http-equiv="X-UA-Compatible" content="IE=edge" />
    <meta name="viewport" content="width=device-width, initial-scale=1.0" />
    <title>Website redirector</title>
  </head>
  <body></body>
</html>
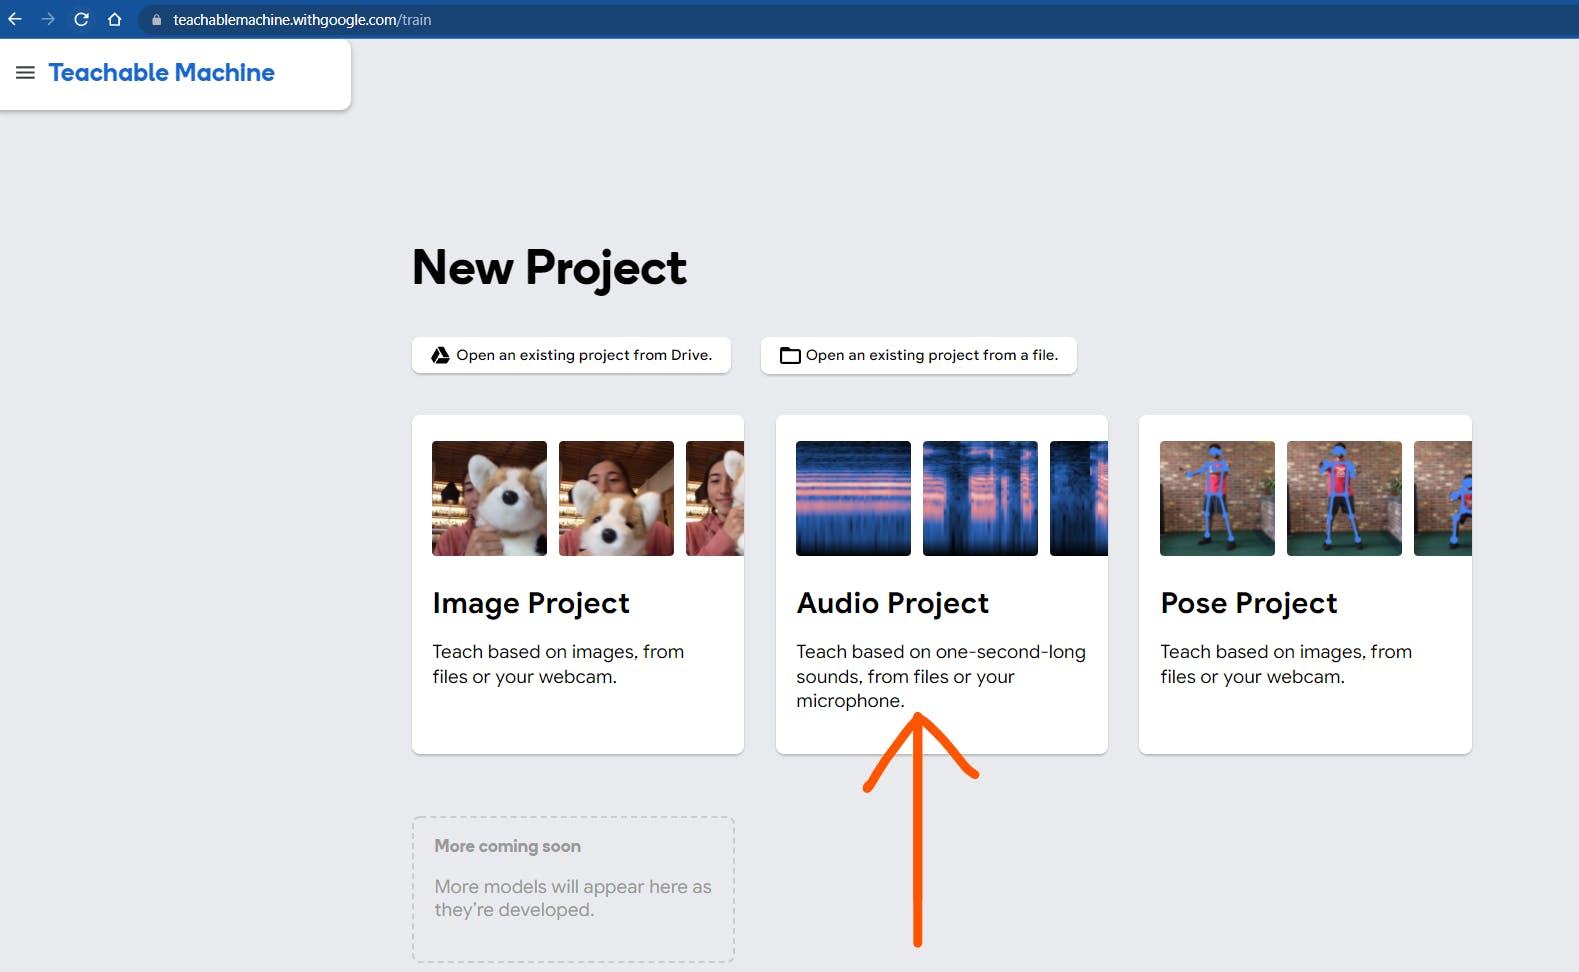
Step 1: Go to Teachable Machine Training Page
Click the Audio Project
Step 2: Recording audio samples
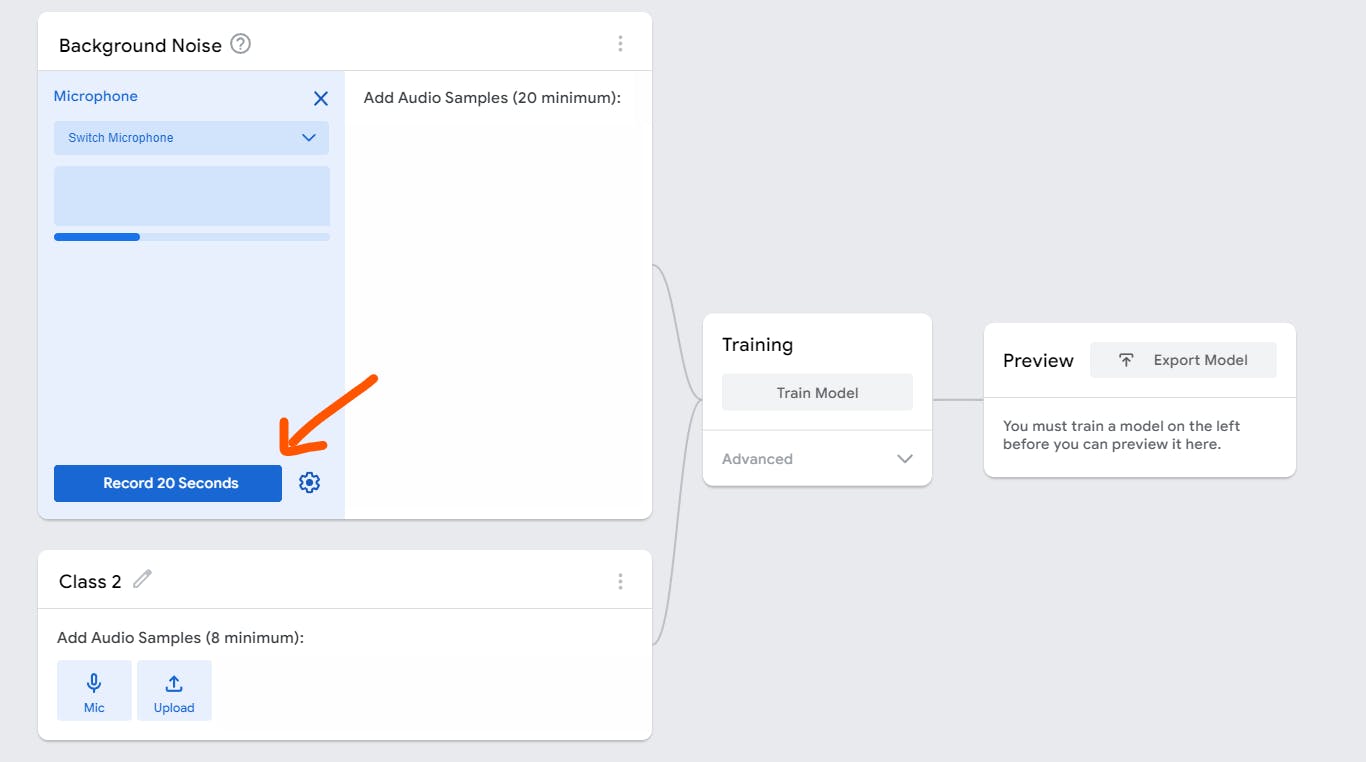
First we will need to record the background noise for 20 seconds.
Sit tight and don't do anything for 20 seconds
Next, for this demo, I'll use finger snapping sound as an example.
Click the pencil ✏️ icon to edit the name from Class 2 to whatever name you like.
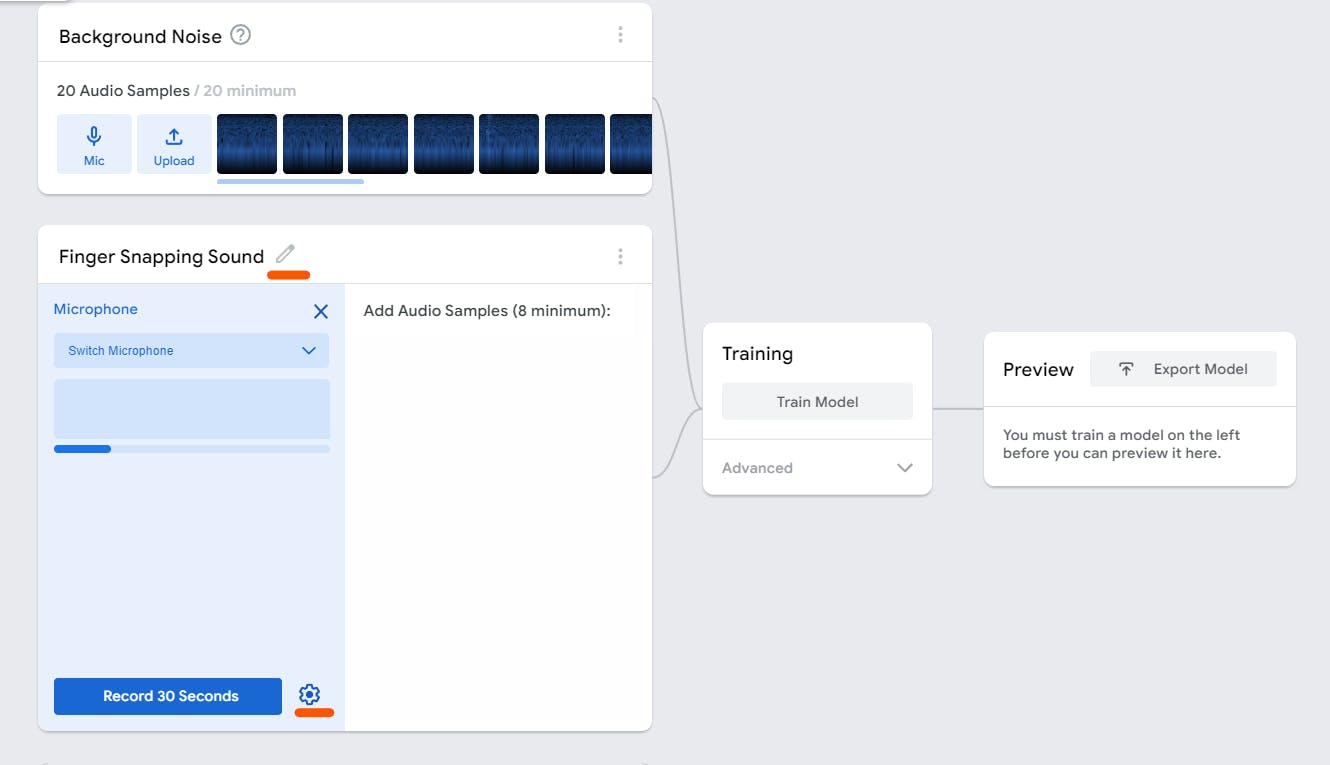
You can adjust the duration of recording by clicking the setting ⚙️ icon
You only need a minimum of 8 audio samples which means you can adjust the duration to only 8 seconds. ( But I recommend record more than 8 samples for better results )
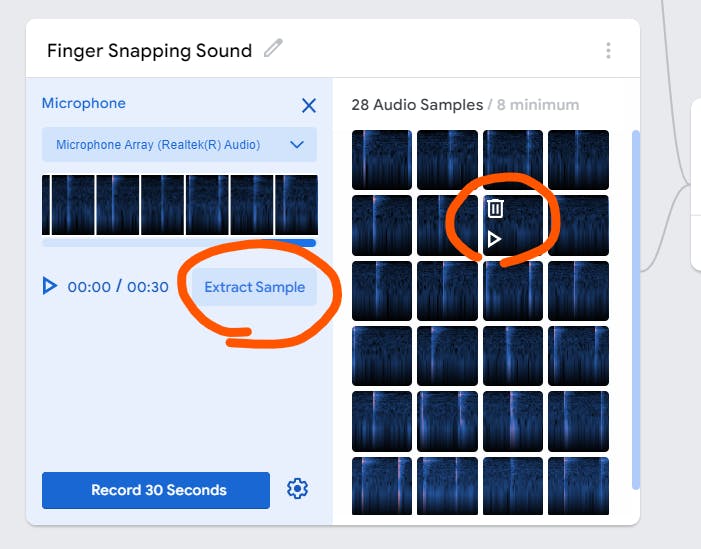
If you want to check your audio samples after recording, click the "Extract sample" button and hover on the sample to either delete or listen to the sample.
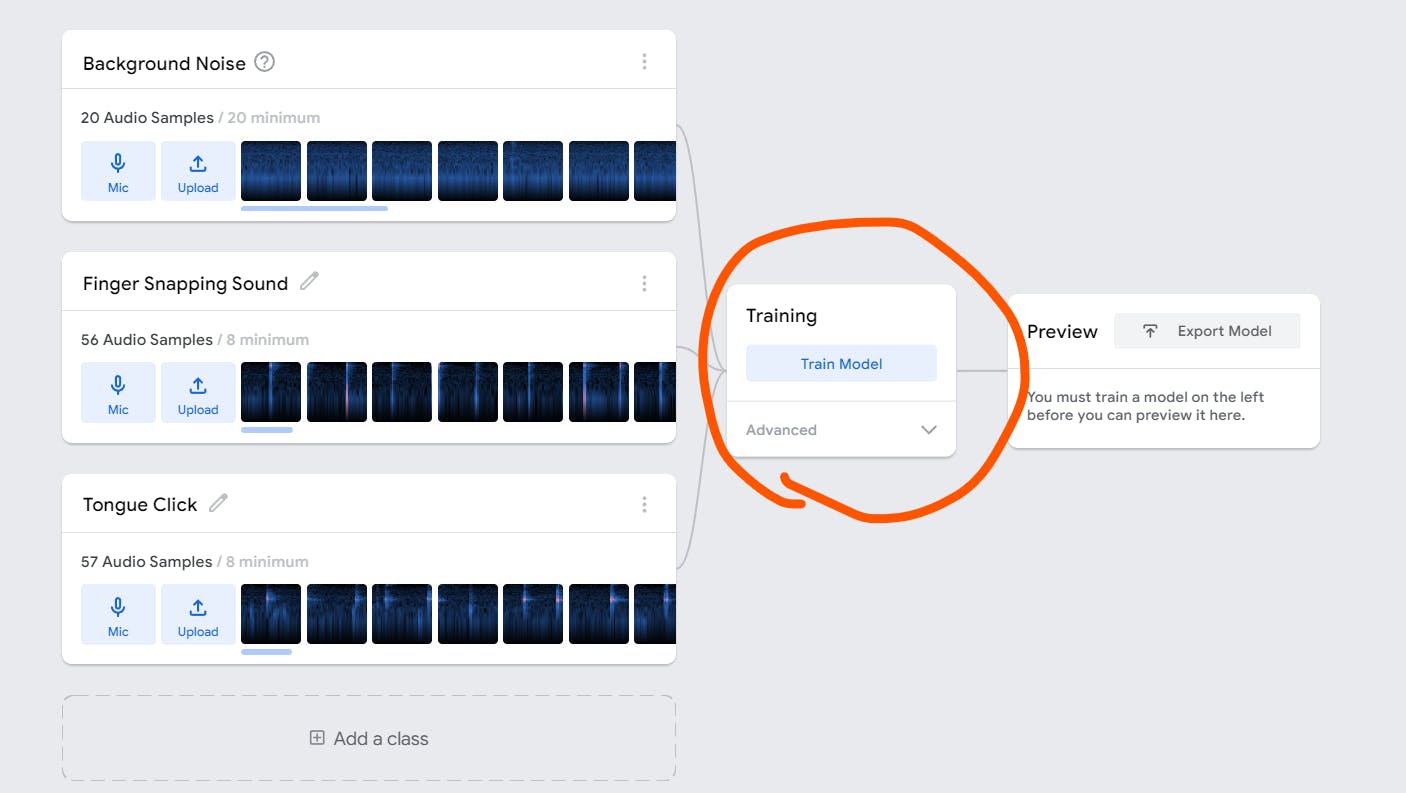
After that, I added a new class called "Tongue Click" and record some audio samples.
Feel free to add more classes & audio samples if you like.
Whenever you are ready, click the "Train Model" button
Step 3: Export the model
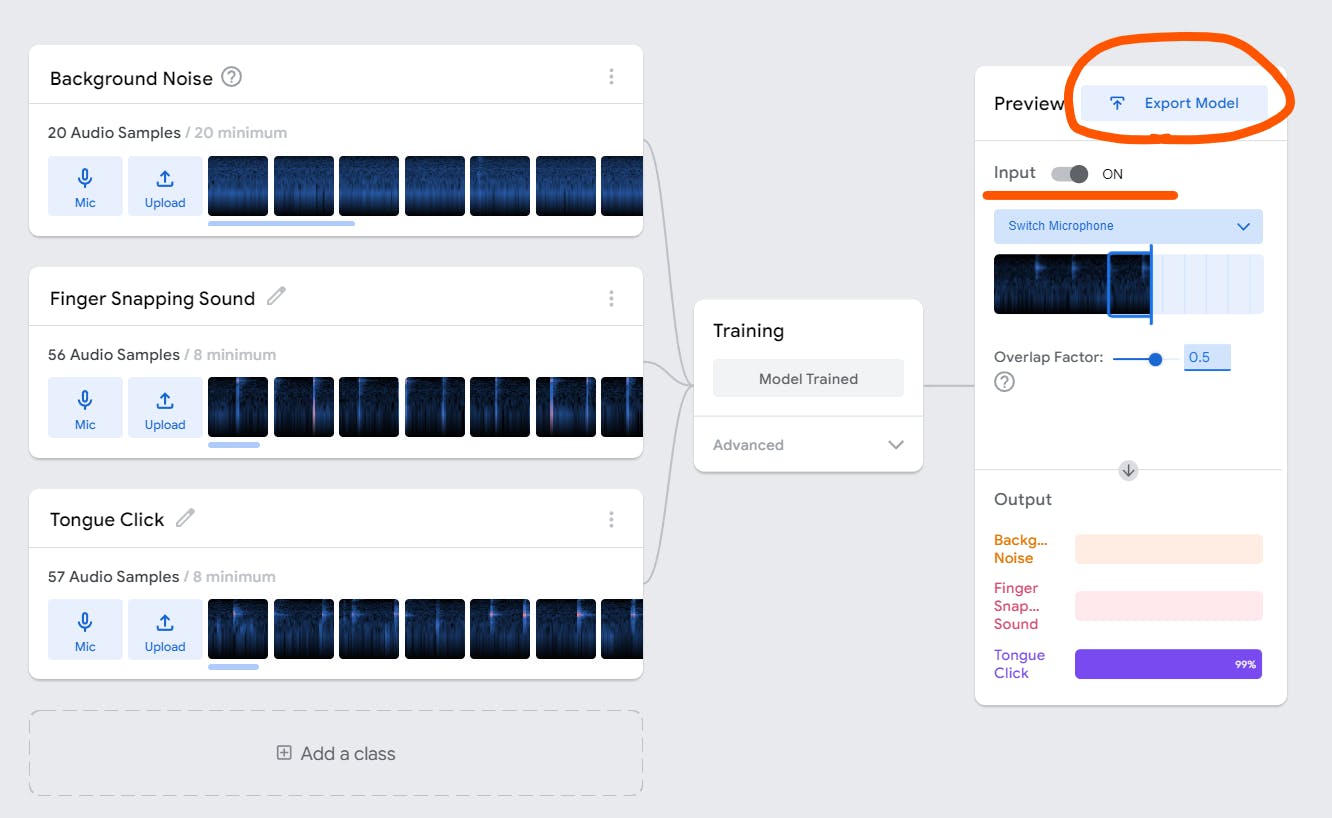
After clicking 'Export Model', you should see the following:
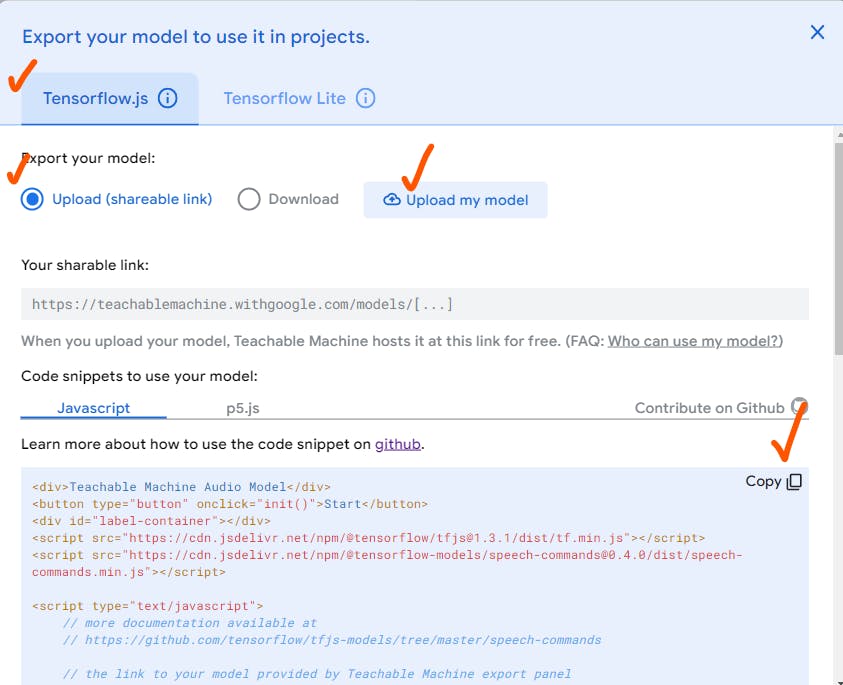
Select Tensorflow.js tab -> Upload my model
After a few seconds, you will see your sharable link
⚠️ COPY & SAVE this link before you close the tab !!! ⚠️
Now click JavaScript tab and copy the code.
If you accidentally closed the tab 😅😅, here is the code: ( change the URL to your own model URL )
<div>Teachable Machine Audio Model</div>
<button type="button" onclick="init()">Start</button>
<div id="label-container"></div>
<script src="https://cdn.jsdelivr.net/npm/@tensorflow/tfjs@1.3.1/dist/tf.min.js"></script>
<script src="https://cdn.jsdelivr.net/npm/@tensorflow-models/speech-commands@0.4.0/dist/speech-commands.min.js"></script>

<script type="text/javascript">
    // the link to your model
    const URL = "https://teachablemachine.withgoogle.com/models/xxxx";
    async function createModel() {
        const checkpointURL = URL + "model.json"; // model topology
        const metadataURL = URL + "metadata.json"; // model metadata
        const recognizer = speechCommands.create(
            "BROWSER_FFT", // fourier transform type, not useful to change
            undefined, // speech commands vocabulary feature, not useful for your models
            checkpointURL,
            metadataURL);

        // check that model and metadata are loaded via HTTPS requests.
        await recognizer.ensureModelLoaded();
        return recognizer;
    }

    async function init() {
        const recognizer = await createModel();
        const classLabels = recognizer.wordLabels();
        const labelContainer = document.getElementById("label-container");
        for (let i = 0; i < classLabels.length; i++) {
            labelContainer.appendChild(document.createElement("div"));
        }

        recognizer.listen(result => {
            const scores = result.scores;
            for (let i = 0; i < classLabels.length; i++) {
                const classPrediction = classLabels[i] + ": " + result.scores[i].toFixed(2);
                labelContainer.childNodes[i].innerHTML = classPrediction;
            }
        }, {
            includeSpectrogram: true, // in case listen should return result.spectrogram
            probabilityThreshold: 0.75,
            invokeCallbackOnNoiseAndUnknown: true,
            overlapFactor: 0.50 // probably want between 0.5 and 0.75. More info in README
        });
    }
</script>
Paste this code inside the <body> tag of our index.html file.
Open the file in the browser and click the 'start' button:
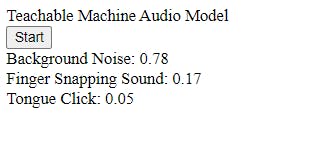
Wooohooo our Audio Model is working ! ( make sure to allow microphone access )
If this is your first time seeing async await, You can learn more about JavaScript promises and async / await here.
Step 4: Refactor and understand the script
Let's first move the script into its own script.js file and create a style.css
After refactoring, index.html now looks like this:
<html lang="en">
  <head>
    <meta charset="UTF-8" />
    <meta http-equiv="X-UA-Compatible" content="IE=edge" />
    <meta name="viewport" content="width=device-width, initial-scale=1.0" />
    <title>Website redirector</title>
    <script src="https://cdn.jsdelivr.net/npm/@tensorflow/tfjs@1.3.1/dist/tf.min.js"></script>
    <script src="https://cdn.jsdelivr.net/npm/@tensorflow-models/speech-commands@0.4.0/dist/speech-commands.min.js"></script>
    <link rel="stylesheet" href="style.css" />
  </head>
  <body>
    <div >Teachable Machine Audio Model</div>
    <button type="button" onclick="init()">Start</button>
    <div id="label-container"></div>
    <script src="./script.js"></script>
  </body>
</html>
And script.js
const URL = "https://teachablemachine.withgoogle.com/models/xxxx";
async function createModel() {
  const checkpointURL = URL + "model.json"; // model topology
  const metadataURL = URL + "metadata.json"; // model metadata
  const recognizer = speechCommands.create(
    "BROWSER_FFT", // fourier transform type, not useful to change
    undefined, // speech commands vocabulary feature, not useful for your models
    checkpointURL,
    metadataURL
  );

  // check that model and metadata are loaded via HTTPS requests.
  await recognizer.ensureModelLoaded();
  return recognizer;
}

async function init() {
  const recognizer = await createModel();
  const classLabels = recognizer.wordLabels();
  const labelContainer = document.getElementById("label-container");
  for (let i = 0; i < classLabels.length; i++) {
    labelContainer.appendChild(document.createElement("div"));
  }
  recognizer.listen(
    (result) => {
      const scores = result.scores;
      for (let i = 0; i < classLabels.length; i++) {
        const classPrediction =
          classLabels[i] + ": " + result.scores[i].toFixed(2);
        labelContainer.childNodes[i].innerHTML = classPrediction;
      }
    },
    {
      includeSpectrogram: true, // in case listen should return result.spectrogram
      probabilityThreshold: 0.75,
      invokeCallbackOnNoiseAndUnknown: true,
      overlapFactor: 0.5, // probably want between 0.5 and 0.75. More info in README
    }
  );
}
The script might look quite daunting so let's console log everything first.
On button click, we call the init() function
But what is the recognizer?
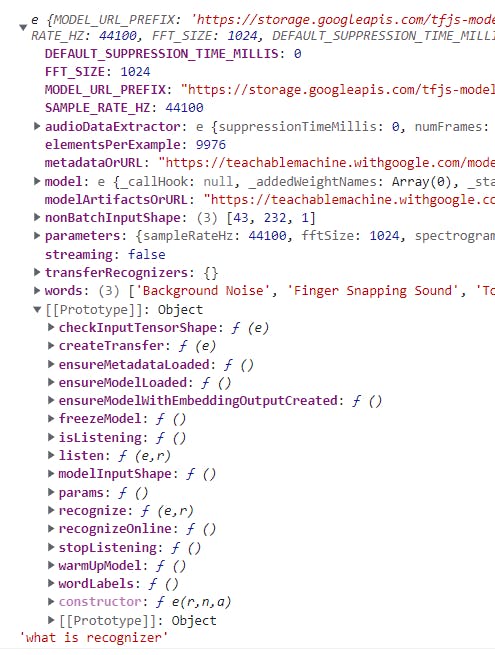
Alright, this looks scary but we don't need to know everything.
For this project, we only need to access the labels of the classes by eitherrecognizer.words or recognizer.wordLabels()
Inside recognizer.listen( (result) => { .... } )
Let's see what scores is:
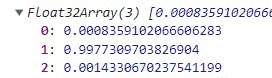
scores is an array of 32-bit floating point numbers. It's the probability of prediction for each class.
In our cases:
- 0 : Background Noise
- 1 : Finger Snapping Sound
- 2 : Tongue Click
Step 5: Update index.html, style.css, and script.js
I added some instructions and emojis in myindex.html.
<html lang="en">
<head>
<meta charset="UTF-8" />
<meta http-equiv="X-UA-Compatible" content="IE=edge" />
<meta name="viewport" content="width=device-width, initial-scale=1.0" />
<title>Website redirector</title>
<script src="https://cdn.jsdelivr.net/npm/@tensorflow/tfjs@1.3.1/dist/tf.min.js"></script>
<script src="https://cdn.jsdelivr.net/npm/@tensorflow-models/speech-commands@0.4.0/dist/speech-commands.min.js"></script>
<link rel="stylesheet" href="style.css" />
</head>
<body>
<div class="content">
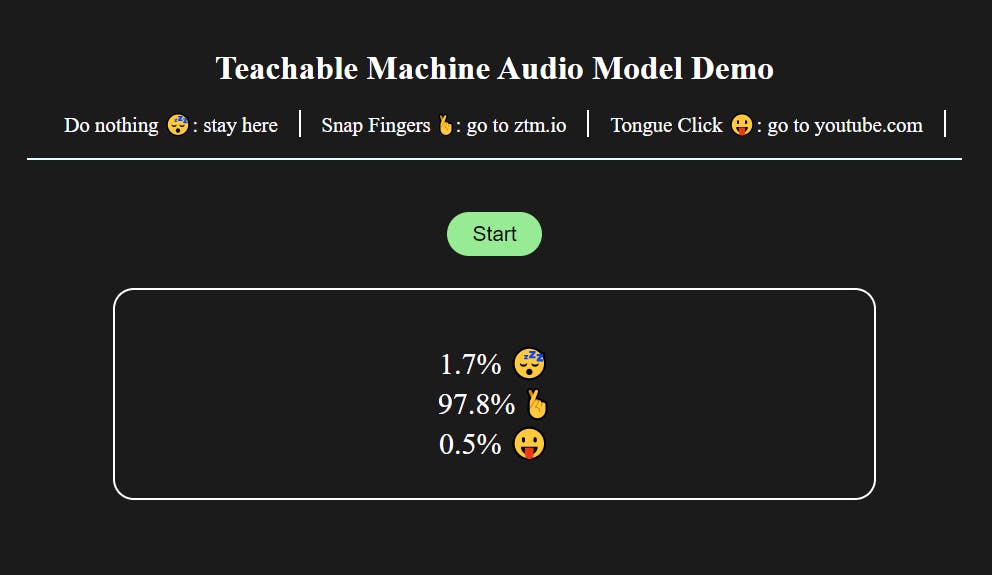
<h1>Teachable Machine Audio Model Demo</h1>
<div class="instruction">
<span>Do nothing 😴: stay here </span>
<span>Snap Fingers 🤞: go to ztm.io </span>
<span>Tongue Click 😛: go to youtube.com </span>
</div>
<button type="button" onclick="init()">Start</button>
<div id="label-container"></div>
</div>
<script src="./script.js"></script>
</body>
</html>
Styling: style.css
html,
body {
  box-sizing: border-box;
  padding: 0;
  margin: 0;
  background-color: rgb(27, 27, 27);
  text-align: center;
  color: #fff;
  display: flex;
  flex-direction: column;
  align-items: center;
}

#label-container {
  font-size: 1.8em;
  padding: 50px;
  margin: 30px auto;
  height: 100px;
  width: 70%;
  border: 2px solid white;
  border-radius: 20px;
}

button {
  background-color: rgb(151, 235, 148);
  border: none;
  outline: none;
  border-radius: 25px;
  padding: 10px 25px;
  font-size: 20px;
  cursor: pointer;
}

button:hover {
  background-color: rgb(49, 216, 71);
  color: #fff;
}

.content {
  margin-top: 80px;
  width: 900px;
  height: 500px;
}

.instruction {
  font-size: 1em;
  display: flex;
  flex-wrap: nowrap;
  justify-content: center;
  border-bottom: 2px solid lightcyan;
  margin-bottom: 50px;
}
.instruction > span {
  font-size: 20px;
  display: inline-block;
  margin-bottom: 20px;
  padding: 0 20px;
  border-right: 2px solid white;
}
Finally script.js
// change to your own model URL
const URL = "https://teachablemachine.withgoogle.com/models/xxxx";
const labelContainer = document.getElementById("label-container");
const info = [
  {
    website: null,
    emoji: "😴",
  },
  { website: "https://zerotomastery.io/", emoji: "🤞" },
  { website: "https://www.youtube.com/", emoji: "😛" },
  // add more stuff if you have more audio classes
];

const openNewTabTo = (score, threshold, childNode, data, recognizer) => {
  const { website, emoji } = data;
  if (score > threshold && website) {
    window.open(website, "_blank");
    recognizer.stopListening(); // stop the recognition once it opens a new tab
  }
  childNode.innerHTML = `${(score * 100).toFixed(1)}% ${emoji} `;
};

async function createModel() {
  const checkpointURL = URL + "model.json"; // model topology
  const metadataURL = URL + "metadata.json"; // model metadata
  const recognizer = speechCommands.create(
    "BROWSER_FFT", // fourier transform type, not useful to change
    undefined, // speech commands vocabulary feature, not useful for your models
    checkpointURL,
    metadataURL
  );
  await recognizer.ensureModelLoaded();
  return recognizer;
}

async function init() {
  const recognizer = await createModel();
  const classLabels = recognizer.words;
  for (let i = 0; i < classLabels.length; i++) {
    labelContainer.appendChild(document.createElement("div"));
  }
  recognizer.listen(
    (result) => {
      const scores = result.scores;
      for (let i = 0; i < classLabels.length; i++) {
        openNewTabTo(
          scores[i],
          0.85,
          labelContainer.childNodes[i],
          info[i],
          recognizer
        );
      }
    },
    {
      includeSpectrogram: true, // in case listen should return result.spectrogram
      probabilityThreshold: 0.75,
      invokeCallbackOnNoiseAndUnknown: true,
      overlapFactor: 0.5, // probably want between 0.5 and 0.75. More info in README
    }
  );
}
What's going on here?
First, I created an info array to store the data for websites and emojis.
const info = [
  {
    website: null,
    emoji: "😴",
  },
  { website: "https://zerotomastery.io/", emoji: "🤞" },
  { website: "https://www.youtube.com/", emoji: "😛" },
  // add more stuff if you have more audio classes
];
Then I created a helper function called openNewTabTo. ( Super creative, I know! )
This function takes 5 arguments: score, threshold, childNode, info data & recognizer object.
Inside my openNewTabTo function:
const openNewTabTo = (score, threshold, childNode, data, recognizer) => {
  const { website, emoji } = data;
  if (score > threshold && website) {
    window.open(website, "_blank");
    recognizer.stopListening(); // stop the recognition once it opens a new tab
  }
  childNode.innerHTML = `${(score * 100).toFixed(1)}% ${emoji} `;
};
Translation:
If the score is greater than the threshold ( I set it to 0.85 ), then open the website in a new tab and stop the recognizer from listening.
For each audio class, display the score in percentage and with an emoji.
This function is called inside a for loop in recognizer.listen( (result) => { ... } )
Summary
Record audio samples
Export Model
Copy your shareable link and unleash your creativity to build cool apps
Thank you for reading this post! Please let me know if you notice any errors!