Create Your Own Discord Bot and Deploy it For Free
Step-by-step guide with source code provided

Looking for a cool project to add to your portfolio ? You've come to the right place.
In this tutorial, we will build a Discord Bot that can send user a random joke, a random activity to do, and a list of popular songs based on genres.
You will learn how to work with APIs, Discord Slash Command, and finally deploy the bot with Railway. We will be using three different APIs and all of them are FREE !
For those who want to follow along, here is the final code. If you prefer to use import/export syntax, you can check out the es6 branch in the same repo.
Before we begin, here are the prerequisites:
A Discord account & your own Discord server
Knowledge with JavaScript, Node.js, & Github
pnpmornpm( In this project, I'm going to usepnpmbecause it's faster thannpm)
We can install pnpm in different ways. If you already havenpmyou can install it with this commandnpm install -g pnpmVisual Studio Code or any other code editors
Step 0: Project setup
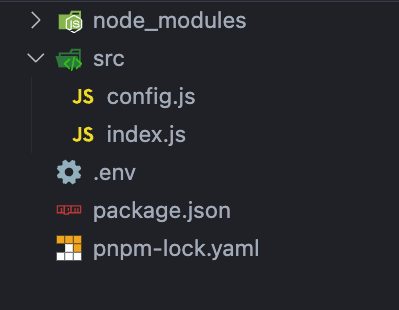
Inside our project directory, open the VS Code terminal and run pnpm init to create a package.json file. After that, create a src folder and add an index.js file inside.
Since we will need a safe place to store some API keys and token later, let's create a .env file in the root directory and add the line below.
CLIENT_ID = ""
GUILD_ID = ""
BOT_TOKEN = ""
API_KEY = ""
We can also create a config.js file inside the src folder ( so that we don't have to keep typing process.env whenever we need to access the environmental variables.
// config.js file
require("dotenv").config();
const setting = {
  token: process.env.BOT_TOKEN,
  clientId: process.env.CLIENT_ID,
  guildId: process.env.GUILD_ID,
  rapidApiKey: process.env.API_KEY,
};
module.exports = setting;
Install packages we need
We need discord.js to work with Discord API, dotenv to load environmental variables, axios for making HTTP requests, and nodemon as a development dependency to automatically restart the node application when file changes.
( Note: Depending on when you are reading this, you might not need dotenv if you are using Node.js v20.6.0. Read more about built-in .env file support here. )
Run the following commands:
pnpm add discord.js dotenv axiospnpm add nodemon -D
Update package.json file
Inside our package.json file, add start and dev scripts
{
  "name": "my-bot",
  "version": "1.0.0",
  "description": "a discord bot",
  "main": "src/index.js",
  "scripts": {
    "start": "node src/index.js",
    "dev": "nodemon src/index.js",
    "test": "echo \"Error: no test specified\" && exit 1"
  },
  "keywords": [],
  "author": "",
  "license": "ISC",
  "dependencies": {
    "axios": "^1.6.2",
    "discord.js": "^14.14.1",
    "dotenv": "^16.3.1"
  },
  "devDependencies": {
    "nodemon": "^3.0.1"
  }
}
Update index.js file
// index.js file
const { Client, Events, GatewayIntentBits } = require("discord.js");
// Create a new client instance
const client = new Client({
  intents: [GatewayIntentBits.Guilds],
});
// When the client is ready, run this code (only once)
client.once(Events.ClientReady, () => {
  console.log("logged in");
});
// Log in to Discord with our bot's token
client.login(" we need token here");
What's going on here ?
We need Client from the discord.js module to interact with the Discord API.
If we check the Client Class from the documentation, it extends BaseClient which extends a Node.js EventEmitter. Therefore, we can use the methods such as emitter.once(eventName, listener) or emitter.on(eventName, listener).
When we create a new Client instance we need to pass in intents option to specify which events our bot should receive. You can explore other intents here. ( "guild" simply means a Discord server and intents are pre-defined WebSocket events ).
Next, the event name we are interested in is the 'ready' event. However, instead of writing client.once("ready", () => { ... }). We can use the Events object that contain many properties to avoid typos.
Finally, we want our bot to login to Discord using the token ( i.e the bot's password ).
We don't have that yet, but we will come back to this part very soon.
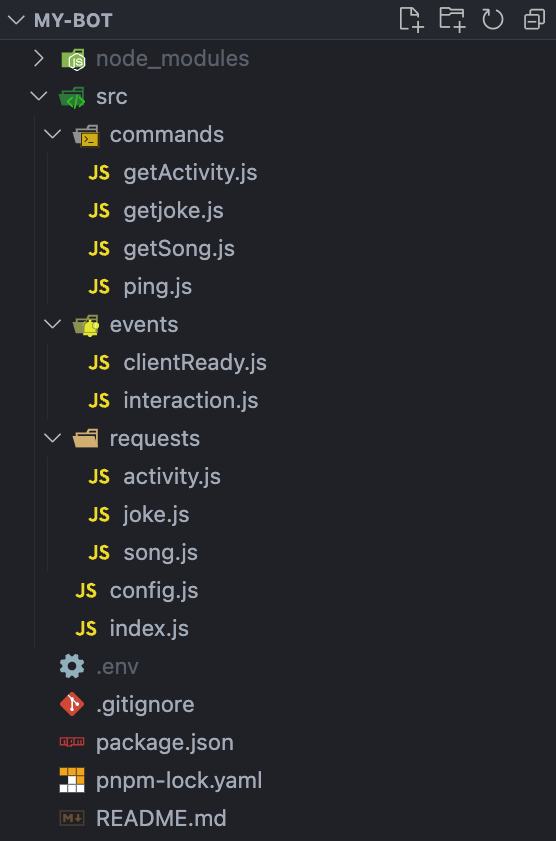
Your project structure should look like this:
Step 1: Invite our Bot to the server
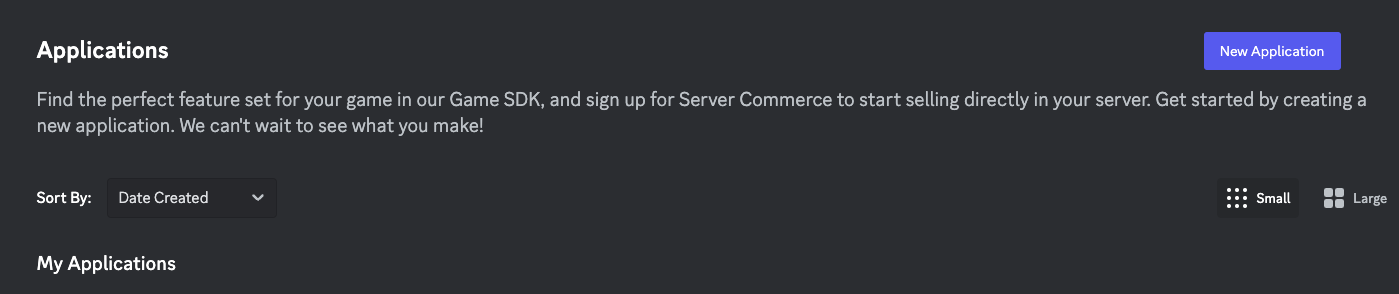
Go to Discord developer portal and click on "New Application".
To avoid any weird issues, please make sure that you don't include the word 'discord' when naming your application. For this project, I will call mine 'ChattyBot'
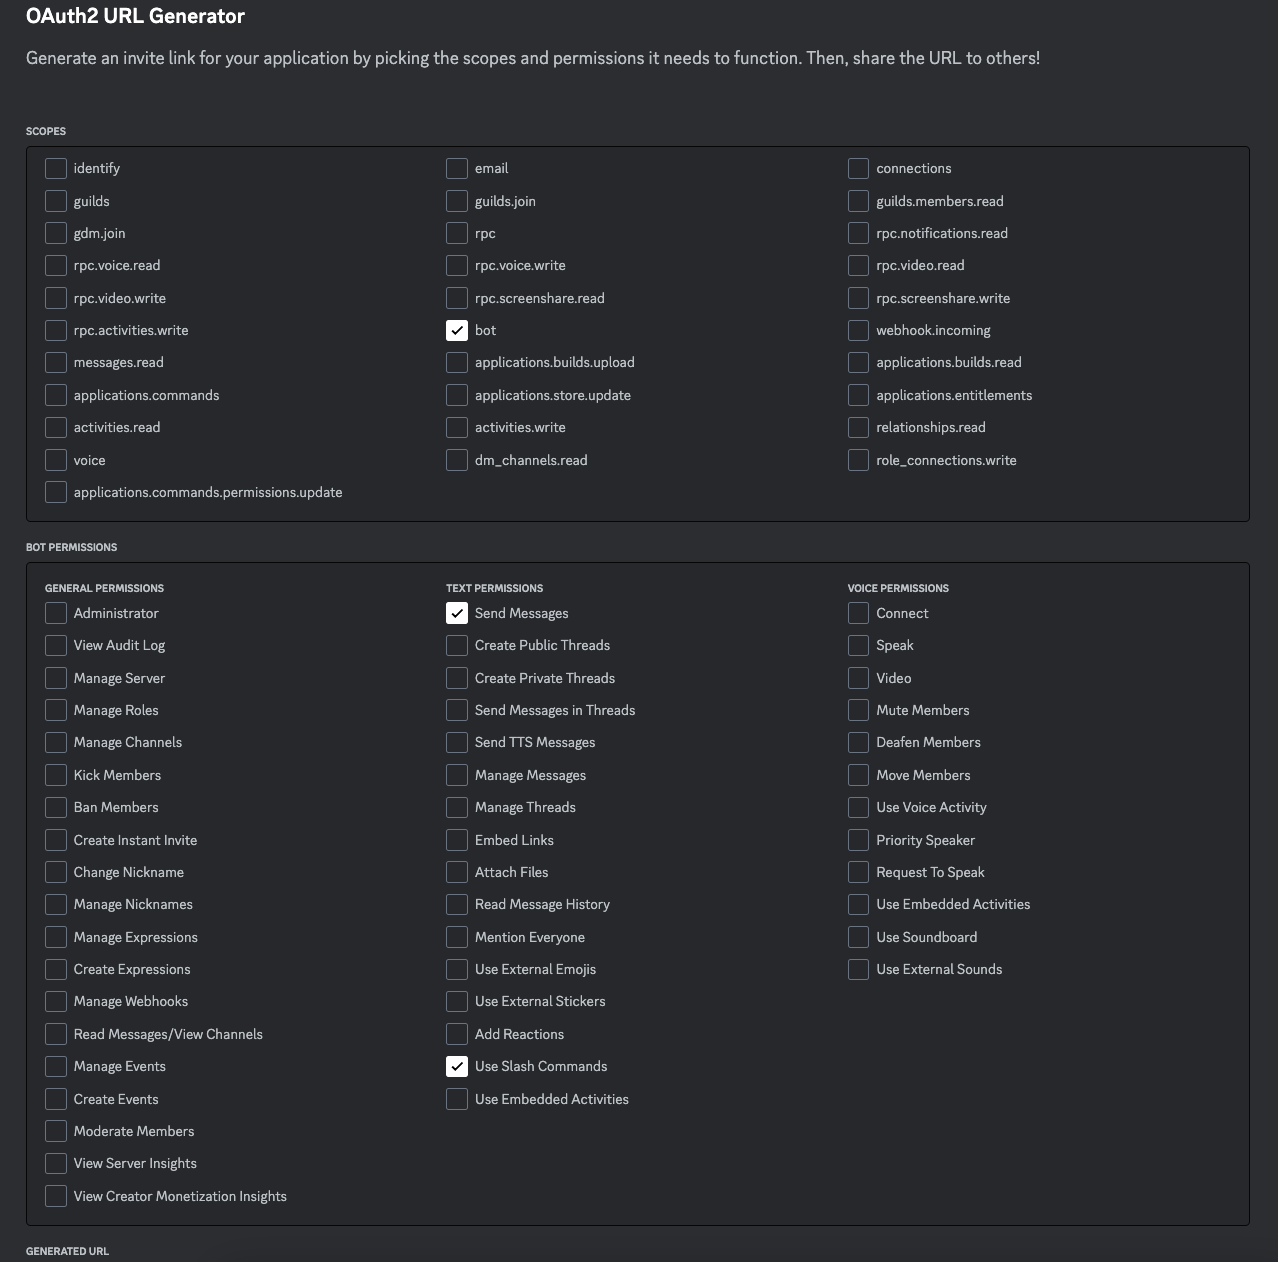
Click on "OAuth2" and then select "URL Generator".
Inside SCOPES, choose "bot". For the BOT PERMISSIONS, choose "Send Messages" and "Use Slash Commands" .
Once you're done, visit the GENERATED URL at the very bottom of this page to invite your bot to your own server. You will be asked which server you want this bot to have access to and click "Authorize" to confirm that you want to grant your bot the permission to send messages and use application commands.
Step 2: Logging in with our Bot
Remember the bot's token we talked about earlier, this is an important step.
Now select 'Bot' on the left panel, under the TOKEN, click on the button 'Reset Token'. ( For security reasons, tokens can only be viewed once. Please reset token if it's lost or you forgot the token. )
Copy this bot token and paste it into our .env file and update our index.js .
// index.js file updated with token
const { Client, Events, GatewayIntentBits } = require("discord.js");
const { token } = require("./config.js");
// Create a new client instance
const client = new Client({
  intents: [GatewayIntentBits.Guilds],
});
// When the client is ready, run this code (only once)
client.once(Events.ClientReady, () => {
  console.log("logged in");
});
// Log in to Discord with our bot's token
client.login(token);
Run the command pnpm run dev and go to your Discord Server. Your bot should be online now !
Step 3: Implementing Slash Commands
Here a few things we need to make slash commands functional
individual command files including the definition and functionality
command handler to load the command files
command deployment script to register the commands
Let's create a folder commands inside src. This is where we store all the files related to our individual slash commands. As a simple exercise, when we type /ping into the discord, we want our bot to respond with "Pong!".
Create a ping.js file inside commands folder with the following code
Individual command file
// ping.js command file
const { SlashCommandBuilder } = require("discord.js");
const data = new SlashCommandBuilder()
  .setName("ping")
  .setDescription("reply with pong");
async function execute(interaction) {
  await interaction.reply("Pong!");
}
module.exports = { data, execute };
Here we use SlashCommandBuilder class to create the command definitions and we also need to export a function execute to respond to an interaction. In our case, we simply want the bot to reply "Pong!"
Update index.js to load the command file
// index.js file updated to load ping command
const { Client, Events, GatewayIntentBits, Collection } = require("discord.js");
const { token } = require("./config.js");
const pingCommand = require("./commands/ping");
// Create a new client instance
const client = new Client({
  intents: [GatewayIntentBits.Guilds],
});
// store ping command
client.commands = new Collection();
client.commands.set(pingCommand.data.name, pingCommand);

// When the client is ready, run this code (only once)
client.once(Events.ClientReady, () => {
  console.log("logged in");
});
// Log in to Discord with our bot's token
client.login(token);
What's going on here ?
We use Collection class for storing commands and for retrieving commands later. It extends JavaScript Map object with extra utility methods.
Register the command
Let's refactor the code a little bit before moving on. In this block of code, our event listener actually has access to the client object. We will register the command in this event listener so let's create a separate file to take care of this.
// let's move the event listener to its own file
client.once(Events.ClientReady, (client) => {
  console.log(`Logged in as ${client.user.username}`);
});
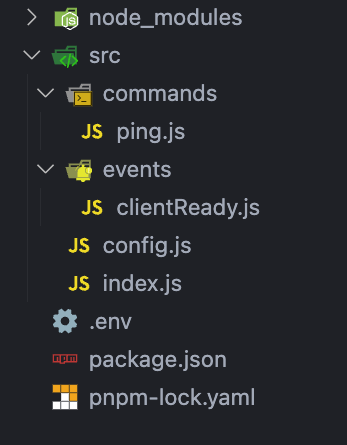
Refactor : create a new folder events in src
Then create clientReady.js file inside the events folder. For now, let's keep it simple.
// clientReady.js file
function clientReadyHandler(client){
  console.log(`Logged in as ${client.user.username}`);
}

module.exports = { clientReadyHandler };
Then update index.js file
// index.js file updated to use clientReadyHandler
const { Client, Events, GatewayIntentBits, Collection } = require("discord.js");
const { clientReadyHandler } = require("./events/clientReady.js");
const { token } = require("./config.js");
const pingCommand = require("./commands/ping");
// Create a new client instance
const client = new Client({
  intents: [GatewayIntentBits.Guilds],
});
// store ping command
client.commands = new Collection();
client.commands.set(pingCommand.data.name, pingCommand);

// When the client is ready, run this code (only once)
client.once(Events.ClientReady, clientReadyHandler);
// Log in to Discord with our bot's token
client.login(token);
Update .env file CLIENT_ID and GUILD_ID
To register the command, we also need the clientId and guildId. You can find the clientId by going to Discord Developer Portal -> General Information -> Copy the Application ID. You can find the guidId by right clicking on your server icon -> Copy Server ID. ( If you can't find this option, go to User Setting -> App Settings -> Advanced -> Turn on Developer Mode toggle )
What you should have in your .env
CLIENT_ID = "your-application-id-here"
GUILD_ID = "your-discord-server-id"
BOT_TOKEN = "your-bot-token"
API_KEY =  ""
Update clientReady.js file
// clientReady.js
const { REST, Routes } = require("discord.js");
const { token, clientId, guildId } = require("../config.js");
// Construct and prepare an instance of the REST module
const rest = new REST().setToken(token);
async function clientReadyHandler(client) {
   console.log(`Logged in as ${client.user.username}`);

  try {
// use rest.put to refresh all commands in the guild with the current set
    const data = await rest.put(
      Routes.applicationGuildCommands(clientId, guildId),
      {
        body: client.commands.map((command) => {
          return command.data.toJSON();
        }),
      }
    );
    console.log(`Loaded ${data.length} commands`);
  } catch (err) {
    console.log("Error", err);
  }
}

module.exports = { clientReadyHandler };
Now when you run pnpm run dev

If you've been following along, your project structure should look like this:
Step 4: Execute commands
Every slash command is an interaction so we need to listen to the event called Events.InteractionCreate that will get triggered when user types a command in the server.
Add this line client.on(Events.InteractionCreate, interactionHandler) in your index.js and then create an interaction.js file inside events folder.
Update index.js
// index.js file updated
const { Client, Events, GatewayIntentBits, Collection } = require("discord.js");
const { clientReadyHandler } = require("./events/clientReady.js");
const { interactionHandler } = require("./events/interaction.js");
const { token } = require("./config.js");
const pingCommand = require("./commands/ping");
// Create a new client instance
const client = new Client({
  intents: [GatewayIntentBits.Guilds],
});
// store ping command
client.commands = new Collection();
client.commands.set(pingCommand.data.name, pingCommand);

// When the client is ready, run this code (only once)
client.once(Events.ClientReady, clientReadyHandler);
client.on(Events.InteractionCreate, interactionHandler);
// Log in to Discord with our bot's token
client.login(token);
Update interaction.js
// events/interaction.js file
async function interactionHandler(interaction) {
  if (!interaction.isChatInputCommand()) return;

  const command = interaction.client.commands.get(interaction.commandName);
  if (!command) return;

  try {
    await command.execute(interaction);
  } catch (error) {
    console.error(error);
    if (interaction.replied || interaction.deferred) {
      await interaction.followUp({
        content: "There was an error while executing this command!",
        ephemeral: true,
      });
    } else {
      await interaction.reply({
        content: "There was an error while executing this command!",
        ephemeral: true,
      });
    }
  }
}

module.exports = { interactionHandler };
What's going on here ?
if (!interaction.isChatInputCommand()) return;
This line means that if the interaction is not a slash command, we want to exit the handler function. Then, we find the matching command from the interaction.client.commands Collection based on the interaction.commandName
Inside the try/catch block, we call the command's execute method and pass in the interaction as the argument. In the catch block, we will send a follow up message if the interaction has already been replied to or has been deferred. ephemeral if set to true, means the message will only be visible to the user who triggered the command.
Phew, this sounds like a lot of work to make slash command work !
Ping Command is Working!
Run pnpm run dev , go to your discord server, and type /ping

Step 5: Working with APIs
Alright! We've finally reached the fun part! We will be using these three APIs:
Random Joke API to get a random joke ( FREE , no need for API key )
Bored API to get a random activity ( FREE , no need for API key)
Rapid API to get some songs from Genius Chart ( FREE , but need to sign up for an API key)
Let's create a new folder requests and create activity.js , joke.js , song.js files inside to work with different APIs.
We will follow the similar approach as the ping command. Let's create getActivity.js, getjoke.js and getSong.js inside commands folder.
Now your folder structure should look like this:
Random Joke API
This one is straightforward, simply send a GET request using axios.get(URL)
This API returns data like this:
{"type":"general","setup":"How does a French skeleton say hello?","punchline":"Bone-jour.","id":134}
Update joke.js
// requests/joke.js file
const axios = require("axios");
const URL = "https://official-joke-api.appspot.com/random_joke";
async function fetchJokes() {
  try {
    const res = await axios.get(URL);
    return res.data;
  } catch (err) {
    console.error(err);
    throw new Error("error fetching random joke!");
  }
}
module.exports = { fetchJokes };
Update getjoke.js
Similar to ping command, we need to define the slash command and execute function. Here we also use EmbedBuilder to make the message look a bit nicer.
You can read more about Embeds here.
// commands/getjoke.js
const { SlashCommandBuilder, EmbedBuilder } = require("discord.js");
const { fetchJokes } = require("../requests/joke");
const data = new SlashCommandBuilder()
  .setName("joke")
  .setDescription("give me a random joke");
async function execute(interaction) {
  await interaction.deferReply();
  try {
    const { setup, punchline, type } = await fetchJokes();
    const embed = new EmbedBuilder()
      .setColor(0x3f70d4)
      .setTitle(`Here is a ${type} joke ... `)
      .addFields(
        { name: "Set up:", value: `${setup} 🤔` },
        {
          name: "\u200b",
          value: "\u200b",
          inline: false,
        },
        { name: "Punchline:", value: `${punchline}  😆 ` }
      )
      .setTimestamp()
      .setFooter({
        text: "powered by official-joke-api.appspot.com",
      });

    await interaction.editReply({ embeds: [embed] });
  } catch (err) {
    await interaction.editReply(err);
  }
}
module.exports = { data, execute };
Update index.js to include joke command
// index.js file updated to include jokeCommand
// ... some code here
const jokeCommand = require("./commands/getjoke.js");
// ... some code here
client.commands.set(jokeCommand.data.name, jokeCommand);
// ... some code here
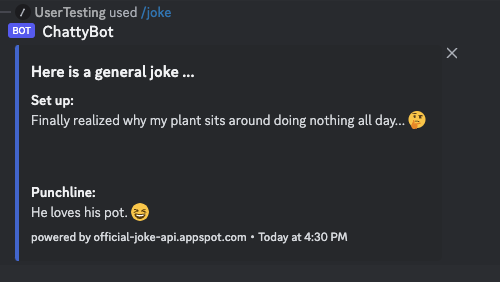
That's it ! If you type /joke in your discord server, you should see
Bored API for Random Activity
We can use this API to find a random activity with a given type. The sample query looks like this http://www.boredapi.com/api/activity?type=recreational and the accepted types are ["education", "recreational", "social", "diy", "charity", "cooking", "relaxation", "music", "busywork"] You can check the documentation to learn more.
Update activity.js
Here we define a fetchActivity function that will take an argument called activityType provided by the user.
// requests/activity.js
const axios = require("axios");
const URL = "http://www.boredapi.com/api/activity";
async function fetchActivity(activityType) {
  try {
    const res = await axios.get(`${URL}?type=${activityType}`);
    return res.data;
  } catch (e) {
    console.error(e);
    throw new Error("error fetching activities !");
  }
}

module.exports = { fetchActivity };
Update getActivity.js
Therefore, in our slash command we need to provide a few options using addStringOption for the user to select. Then, we can retrieve the option value with this line interaction.options.getString("type") and pass this value to fetchActivity
// commands/getActivity.js
const { SlashCommandBuilder } = require("discord.js");
const { fetchActivity } = require("../requests/activity");

const data = new SlashCommandBuilder()
  .setName("activity")
  .setDescription("a random activity to do")
  .addStringOption((option) => {
    return option
      .setName("type")
      .setDescription("Choose a type of activity you are interested")
      .setRequired(true)
      .addChoices(
        { name: "Education", value: "education" },
        { name: "Recreational", value: "recreational" },
        { name: "Social", value: "social" },
        { name: "DIY", value: "diy" },
        { name: "Charity", value: "charity" },
        { name: "Cooking", value: "cooking" },
        { name: "Relaxation", value: "relaxation" },
        { name: "Music", value: "music" },
        { name: "Busywork", value: "busywork" }
      );
  });

async function execute(interaction) {
  const type = interaction.options.getString("type"); // this returns the option value
  const { activity } = await fetchActivity(type);
  await interaction.reply(`Activity Idea: ${activity}`);
}

module.exports = { data, execute };
Don't forget to add this to your index.js file
// ... some code here
const activityCommand = require("./commands/getActivity.js");
// ... some code here
client.commands.set(activityCommand.data.name, activityCommand);
Rapid API - Genius Song Lyrics
We need to sign up to get an API key. Once you have an account, go to Apps in the nav bar -> My Apps -> Authorization -> Copy the API Key to your .env file.
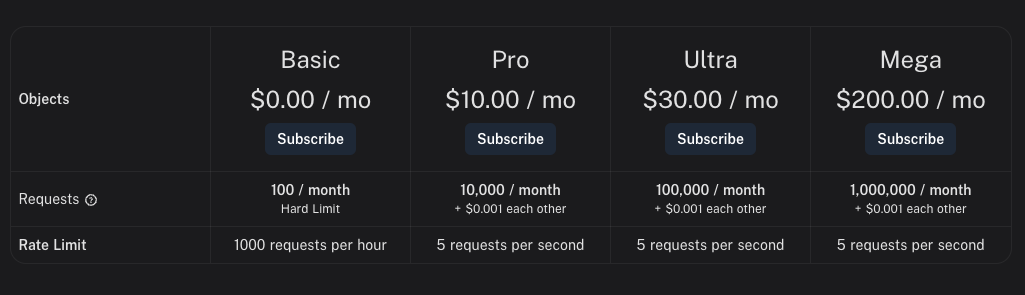
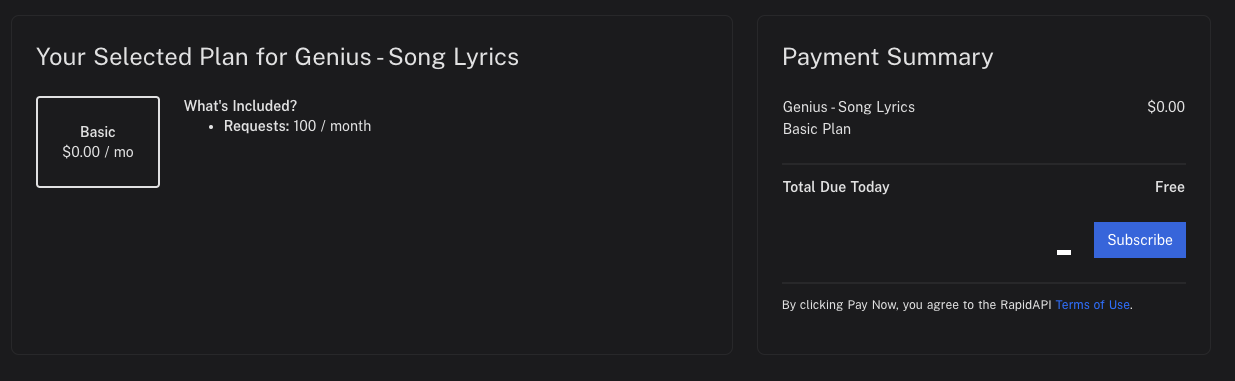
Go to this page and click the Subscribe to Test button, then subscribe to the Basic plan that gives you 100 requests per month.
No need to enter any credit card information. Click on Subscribe in the Payment Summary. Now you can test / explore the endpoint on this page.
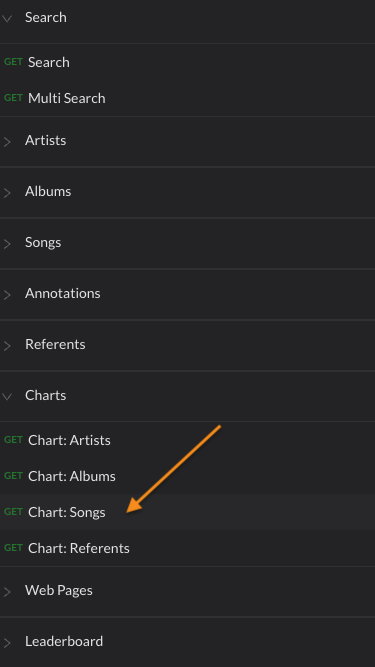
The data we are interested in: Charts -> Chart:Songs
Update song.js
// requests/song.js file
const axios = require("axios");
const URL = "https://genius-song-lyrics1.p.rapidapi.com/chart/songs/";
const API_HOST = "genius-song-lyrics1.p.rapidapi.com";
const { rapidApiKey } = require("../config");

// Quota Limit 100 / month
async function fetchSongs(time = "all_time", genre = "all") {
  const options = {
    method: "GET",
    url: URL,
    // params are optional
    params: {
      time_period: time, // day, week, month, all_time
      chart_genre: genre, // all, rap, pop, rb, rock, country
      per_page: 10, // number of results return per request
    },
    headers: {
      "X-RapidAPI-Key": rapidApiKey,
      "X-RapidAPI-Host": API_HOST,
    },
  };
  try {
    const response = await axios.request(options);
    const items = response.data.chart_items;

    const dataArray = items.map((item) => {
      const {
        artist_names,
        title,
        url,
        release_date_for_display
      } = item.item;

      return {
        artist: artist_names || "no artist",
        title: title || "no title",
        url: url || "no url",
        date: release_date_for_display || "no releast date",
      };
    });

    return dataArray;
  } catch (error) {
    console.error(error);
  }
}

module.exports = { fetchSongs };
fetchSongs function will take 2 arguments ( again we will use addStringOption in our getSong.js command file to get the option value ). Here we transform the data to return only artist, title, url, and date. You can console log to see what else data is available.
Update getSong.js
const { SlashCommandBuilder, EmbedBuilder } = require("discord.js");
const { fetchSongs } = require("../requests/song");

const data = new SlashCommandBuilder()
  .setName("songs")
  .setDescription("recommend 10 songs to me!")
  .addStringOption((option) =>
    option
      .setName("period")
      .setDescription("Choose the time period")
      .setRequired(true)
      .addChoices(
        { name: "All Time Favorite", value: "all_time" },
        { name: "What's Popular This Month", value: "month" },
        { name: "What's Popular This Week", value: "week" },
        { name: "What's Popular Today", value: "day" }
      )
  )
  .addStringOption((option) => {
    return option
      .setName("genre")
      .setDescription("Choose the genre of music you are interested in")
      .setRequired(true)
      .addChoices(
        { name: "All", value: "all" },
        { name: "Rap", value: "rap" },
        { name: "Pop", value: "pop" },
        { name: "R&B", value: "rb" },
        { name: "Rock", value: "rock" },
        { name: "Country", value: "country" }
      );
  });

async function execute(interaction) {
  const period = interaction.options.getString("period"); // this returns the option value
  const genre = interaction.options.getString("genre"); // this returns the option value

  try {
    const songArr = await fetchSongs(period, genre);

    const embed = new EmbedBuilder()
      .setColor(0x3f70d4)
      .setTitle(`Here are the songs ... `)
      .setTimestamp()
      .setFooter({
        text: "powered by genius-song-lyrics1.p.rapidapi.com",
      });
    for (let i = 0; i < songArr.length; i++) {
      const { artist, title, url } = songArr[i];
      const fieldName = `Song: ${title}\nBy: ${artist}`;
      const fieldValue = `Check out the link: ${url}`;
      embed.addFields({ name: fieldName, value: fieldValue, inline: false });
    }

    await interaction.reply({ embeds: [embed] });
  } catch (err) {
    console.log(err);
  }
}

module.exports = { data, execute };
Finally, your index.js file should look like this !
// index.js complete & remove all comments
const { Client, Events, GatewayIntentBits, Collection } = require("discord.js");
const { clientReadyHandler } = require("./events/clientReady.js");
const { interactionHandler } = require("./events/interaction.js");
const { token } = require("./config.js");

const pingCommand = require("./commands/ping");
const jokeCommand = require("./commands/getjoke.js");
const activityCommand = require("./commands/getActivity.js");
const songCommand = require("./commands/getSong.js");
const client = new Client({
  intents: [GatewayIntentBits.Guilds],
});

client.commands = new Collection();
client.commands.set(pingCommand.data.name, pingCommand);
client.commands.set(jokeCommand.data.name, jokeCommand);
client.commands.set(activityCommand.data.name, activityCommand);
client.commands.set(songCommand.data.name, songCommand);

client.once(Events.ClientReady, clientReadyHandler);
client.on(Events.InteractionCreate, interactionHandler);

client.login(token);
Our project is done! You can push the changes to your Github repo.
Note: Please make sure to add your .env file in .gitignore ⚠️
Step 6: Deploy to Railway App
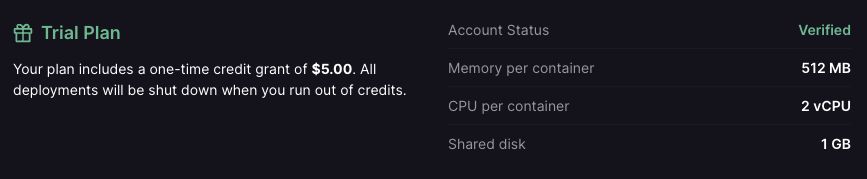
At the time of writing, it's free to sign up ( with Github or email ). As a new user, you have a one-time grant of $5 credit.
Best part ?! No need to enter any credit card information YEAH 🥳🥳 !
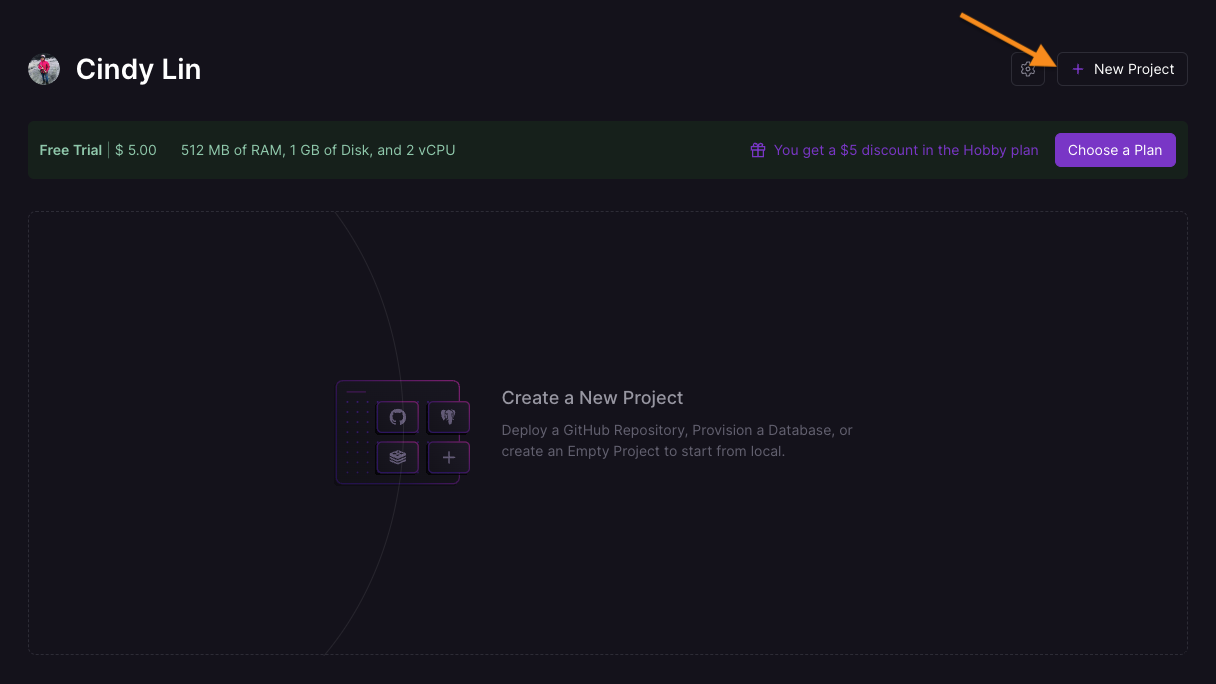
Create a new project
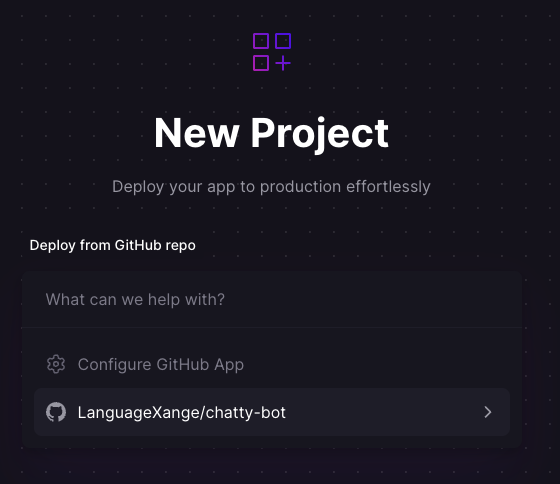
Go to Dashboard and click on "New Project"
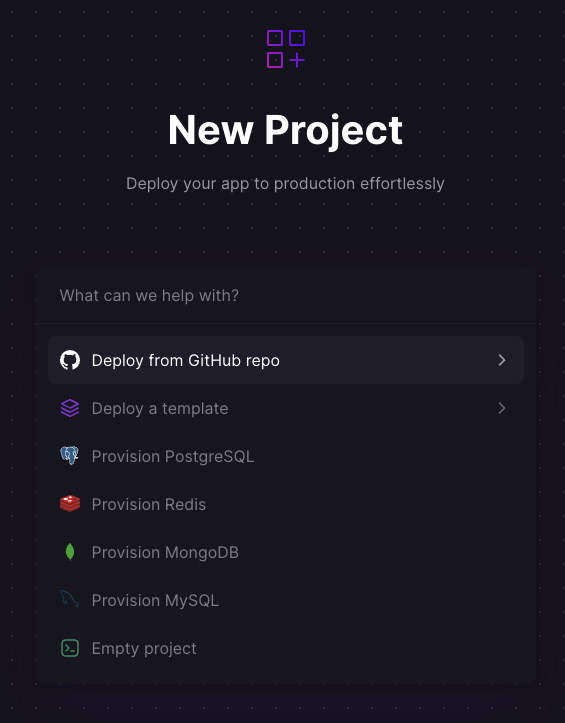
Select Deploy from Github repo
You will be asked which repositories Railway App has access to. Select "Only select repositories" and click on "Install & Authorize" Button.
Refresh the page and you should see your repo in the dropdown menu
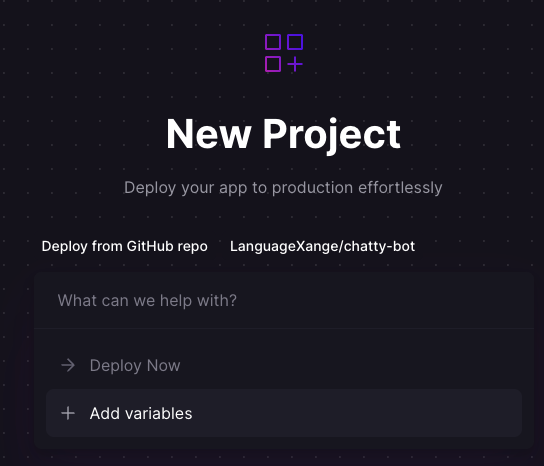
Next step, we need to add our environmental variables
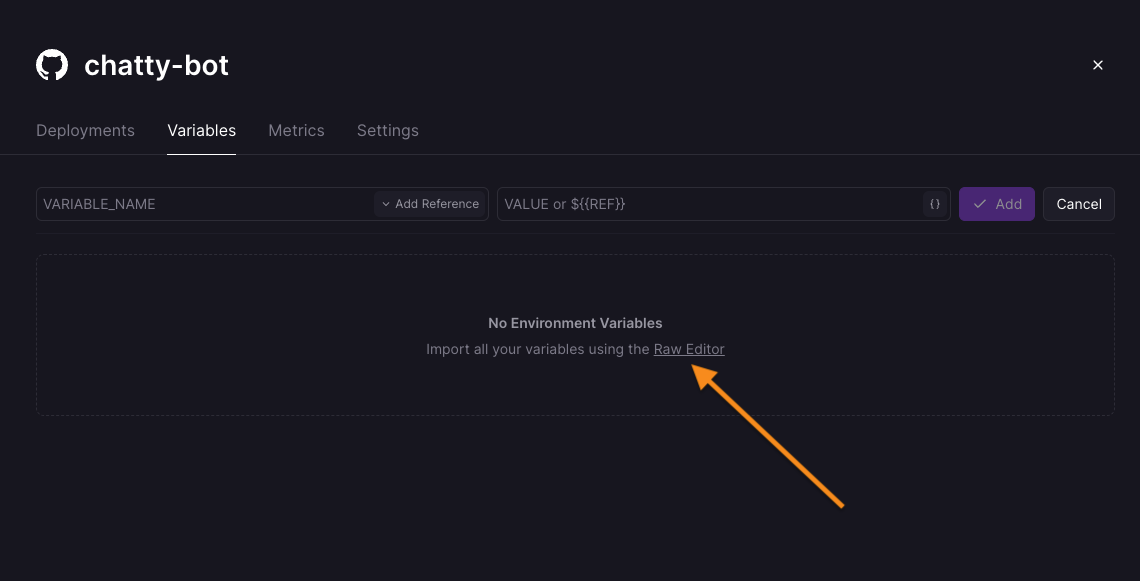
Add Env Variables Using Raw Editor
Click the raw editor and copy paste your .env file inside.
Trust me, you don't want to enter your variables one by one!
That's it ! Congratulations 🎉🎉🎉!
This is the final code and feel free to fork it! Let me know what you think!


